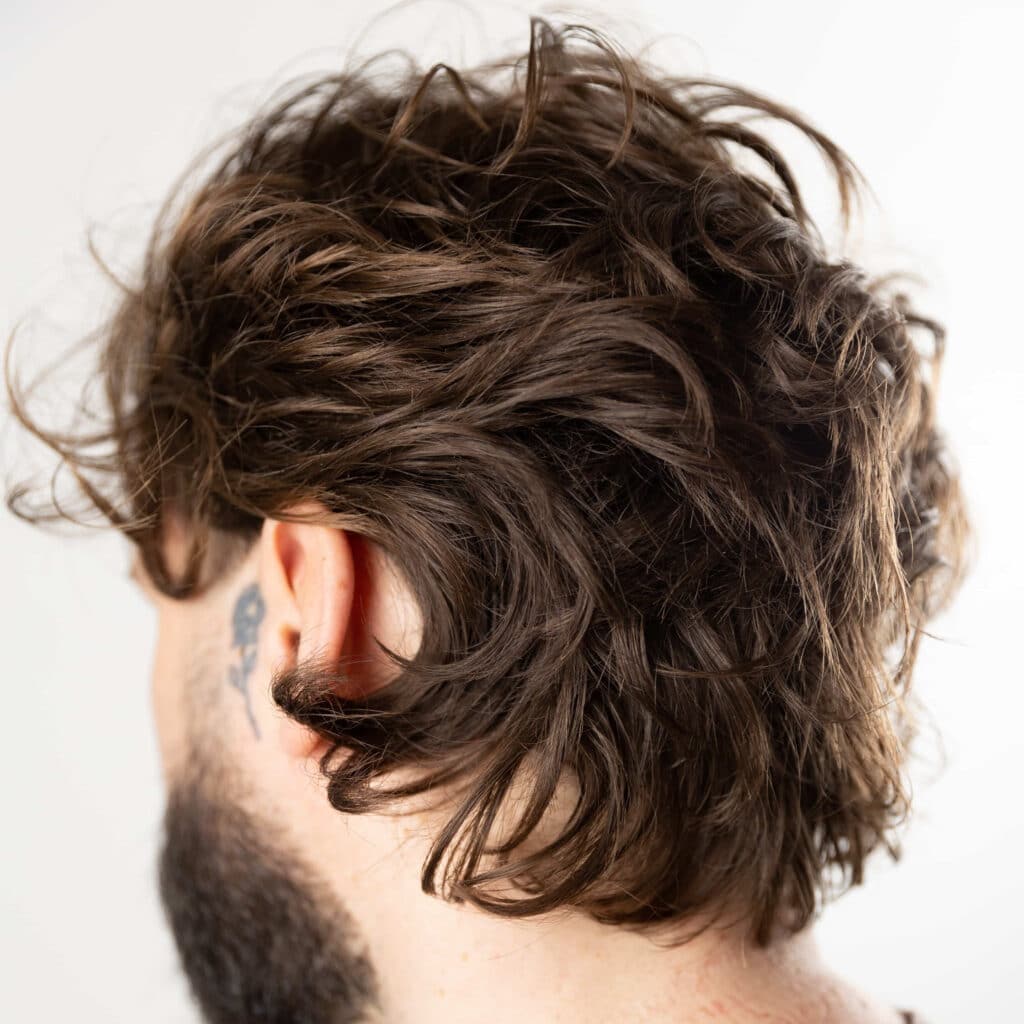
Creating a textured mid-length men’s cut by Award-Winning Barber
Ross ‘Blue Steel’ Mathieson, of luxury Norwich barbershop Son of the Bear walks you through each step of the process of this authentically lived-in and trendy cut.
From preparation to final touches, and a few useful techniques to help create extra texture!
You’ll learn tips on:
- Over-directing
- Cutting Position
- Balance Checking
- Razoring
All this results in a low key haircut that more chilled lo-fi clients will wear with pride. So, whether you’re a seasoned barber looking to refine your skills or a beginner eager to learn, let’s dive in and unlock the secrets to all that texture!
You can watch the full video below, or view in Youtube – or you can check out the recap on key points in the handy drop downs.
We hope you enjoy, perhaps learn something – and most importantly : be inspired!
Recap on key stages
Get a text breakdown of each part of the haircut below. Select the dropdown to read more!
Stage 1: Preparation and Consultation
Prior to starting the haircut, conduct a comprehensive consultation with the client to understand their preferences and any specific requirements. Begins by assessing the client's hair growth patterns to determine the best approach for the haircut.Stage 2: Sectioning and Mapping
Divide the hair into sections to simplify the haircutting process and ensure precision. By mapping out the haircut, you can more easily identify areas where texture and layering are needed, especially in this case focusing on the back of the client's hair.Stage 3: Creating the Perimeter
Creates radial sections using a comb as a guide to identify the highest point of the head (Apex) and split it accordingly. Starting with the back section, carefully use a razor to remove weight while maintaining as much weight as possible around the nape of the neck. Aim for a natural, lived-in look.Stage 4: Profile Sections for Length
Establish the desired length by aiming for the occipital bone on the first section and maintaining a square shape. Using scissors, layers the hair, focusing on maintaining weight below the occipital bone while softening the shape around the ears.Stage 5: Creating Texture
Uses diagonal sections to create texture, removing weight above the occipital bone with a razor blade. Utilizing scissors, employ directional slicing to add movement and texture, particularly in this case again, at the back of the hair.Stage 6: Finishing Touches
Apply Dark Stag Sea Salt Spray to help enhance the textured look. Use a diffuser to even further accentuate the natural texture and achieve a lived-in, beachy appearance.
Are you a barber and want to stock the Dark Stag Styling Range?
Please register as a barber below, and get access to starter deals, barber loyalty scheme, and barber pricing!


